Motivations and Objectives
Additive manufacturing (AM) is a relatively nascent field of manufacturing that relies on the addition rather than the removal of material to construct a desired article. During the fabrication process, imperfections may occur which negatively impact the structure and surface quality of the manufactured part, among other qualities. These imperfections can be monitored and characterized while part is assembled, which allows for feedback control of the process parameters. Through an effective implementation, a higher accuracy in production can be expected, along with greater structural integrity. This will allow for greater freedom in rapid prototyping and can serve as a comparable alternative to high-precision machining. One of the open challenges is the effect of part geometry on the sensing modality and by extension, flaw detection. This is reflected in the image data recorded in-situ and can be processed to determine abnormalities as they occur.
Method of Approach
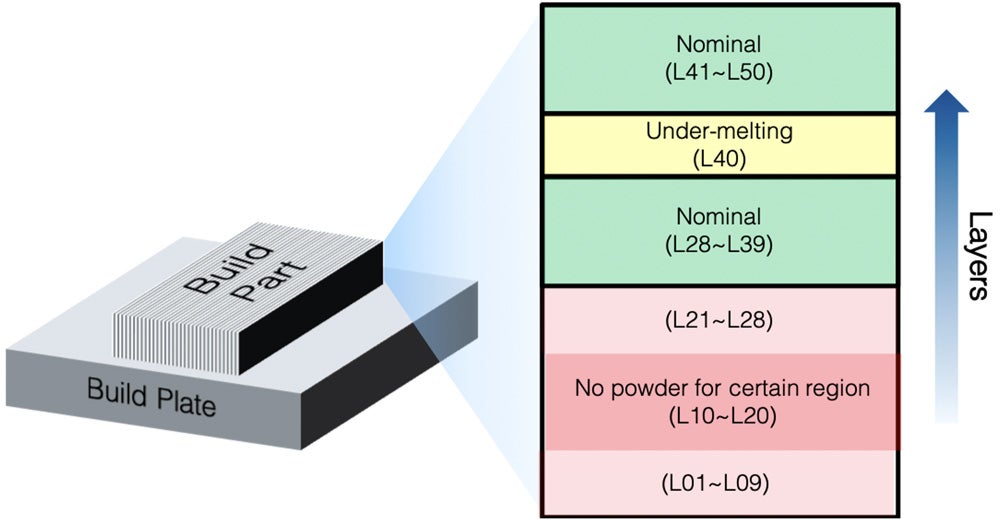
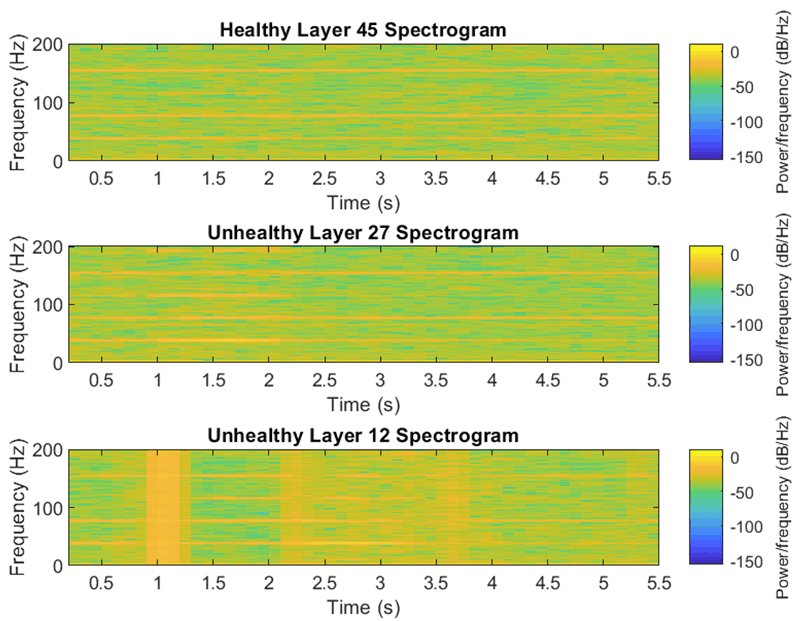
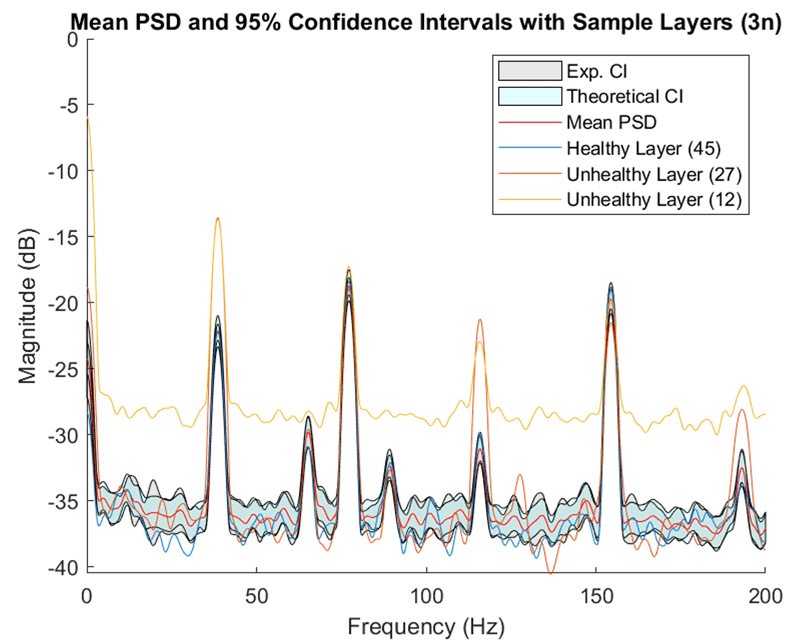
Most existing work focuses on single image analysis. We propose that by considering the full series of images, a more accurate indication of certain process defects can be obtained in real time. Sample data was generated with intentional defects and the associated thermal imaging data is analyzed in the time series and in the frequency domain. In particular, the spectrogram is of interest, as certain increases across certain bands show long term defect behavior.
Current Work
- Sensing imperfections in direct energy deposition (DED) metal AM. Singular imperfections are considered in conjunction with larger scale faults.
- Thermal response signal is reduced in dimension and processed in the frequency domain to view irregularity effects.
- The relationship between the output response and geometry is currently being assessed.
- Machine learning applications are being considered to characterize the geometry dependence.


